
One thing I have really gotten into this year is having nice nails. For a while there I was getting dip nails at the salon and while they looked amazing, let’s be honest they can be quite pricey to maintain! Not to mention that when I got the nails taken off, the nail artist was super rough and left my nails really cracked and ruined – gutted! So naturally I decided to do them myself at home. I started looking around for nail systems (especially dip nails as I just love the finish) and I discovered GLAMRDiP. This brand had absolutely fantastic reviews and the whole system looked so easy. So here we go – my full, in-depth GLAMRDiP review.
ABOUT GLAMRDiP
GLAMRDiP are an Australian owned business who offer a dip nails system that’s non-toxic and easy to do at home. The fact that this product is non-toxic, cruelty-free and 18-free really sold it to me! One thing I hated at the nail salon was the chemical powders that were used and the fact that it was so easy to inhale these as they did your nails. The GLAMRDiP formula contains no Formaldehyde, Toluene, Formaldehyde Resin, Camphor, Xylene, Parabens, Phthalates, Rosin, Ethyl Tosylamide, TPHP (Triphenyl Phosphate), and Triclosan – all of which are extremely harmful to our bodies and often found in mainstream nail polish brands.
The other thing I instantly liked about this system was that since I’m the only one using it, it’s a lot more hygienic. I feel like some nail salons aren’t very hygienic at all, with many sharing dip powder pots – gross! Being able to do my nails at home and have control over not only what ingredients are used on my nails, but also knowing that it’s hygienic is a big win for me.

GLAMRDiP KITS
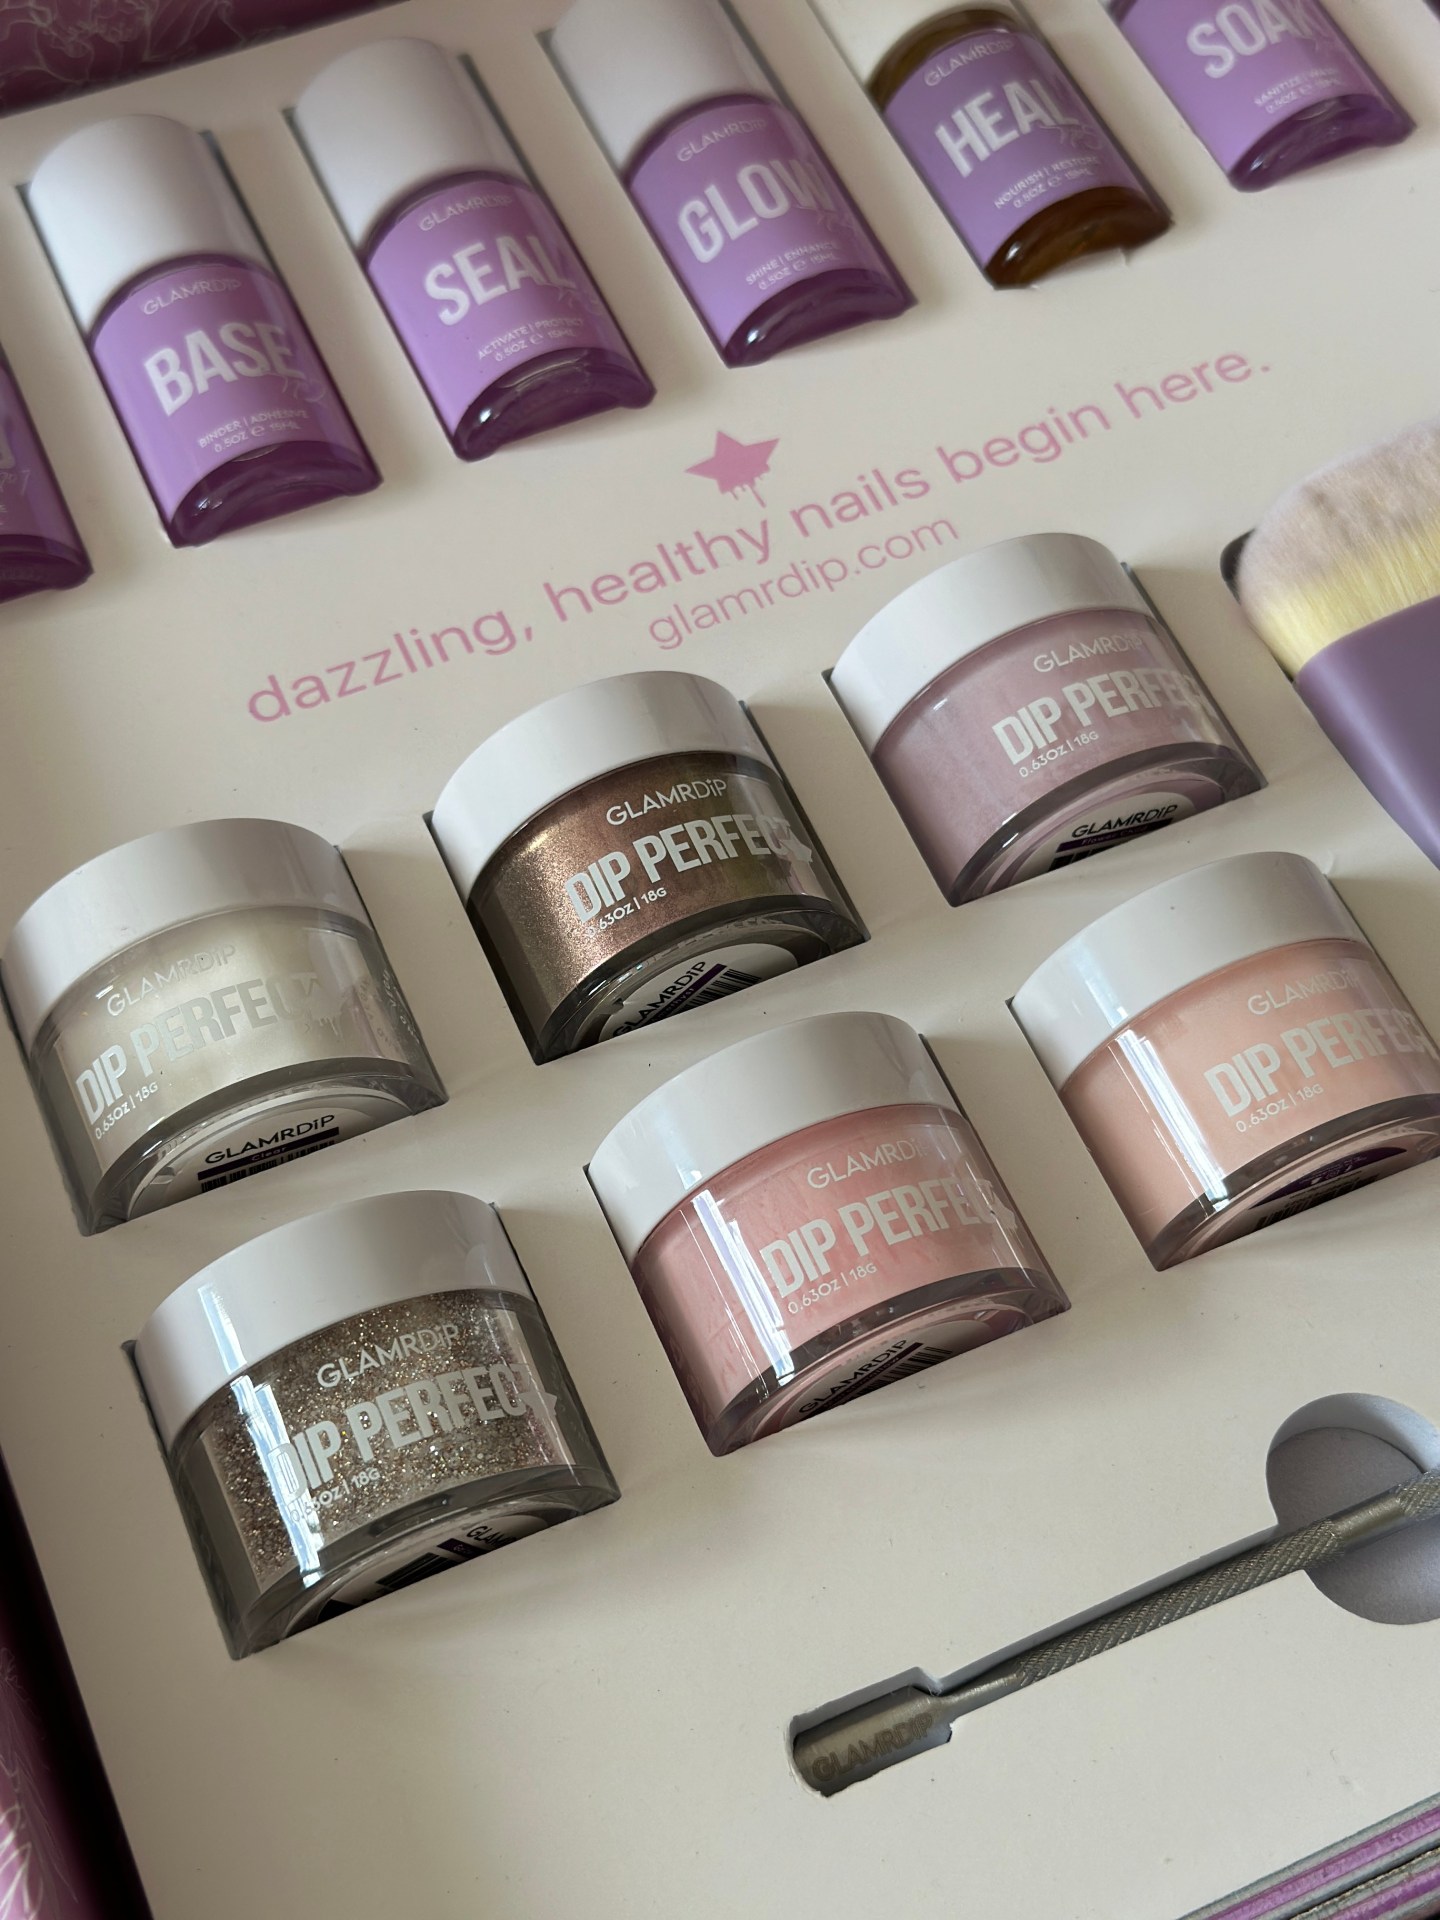
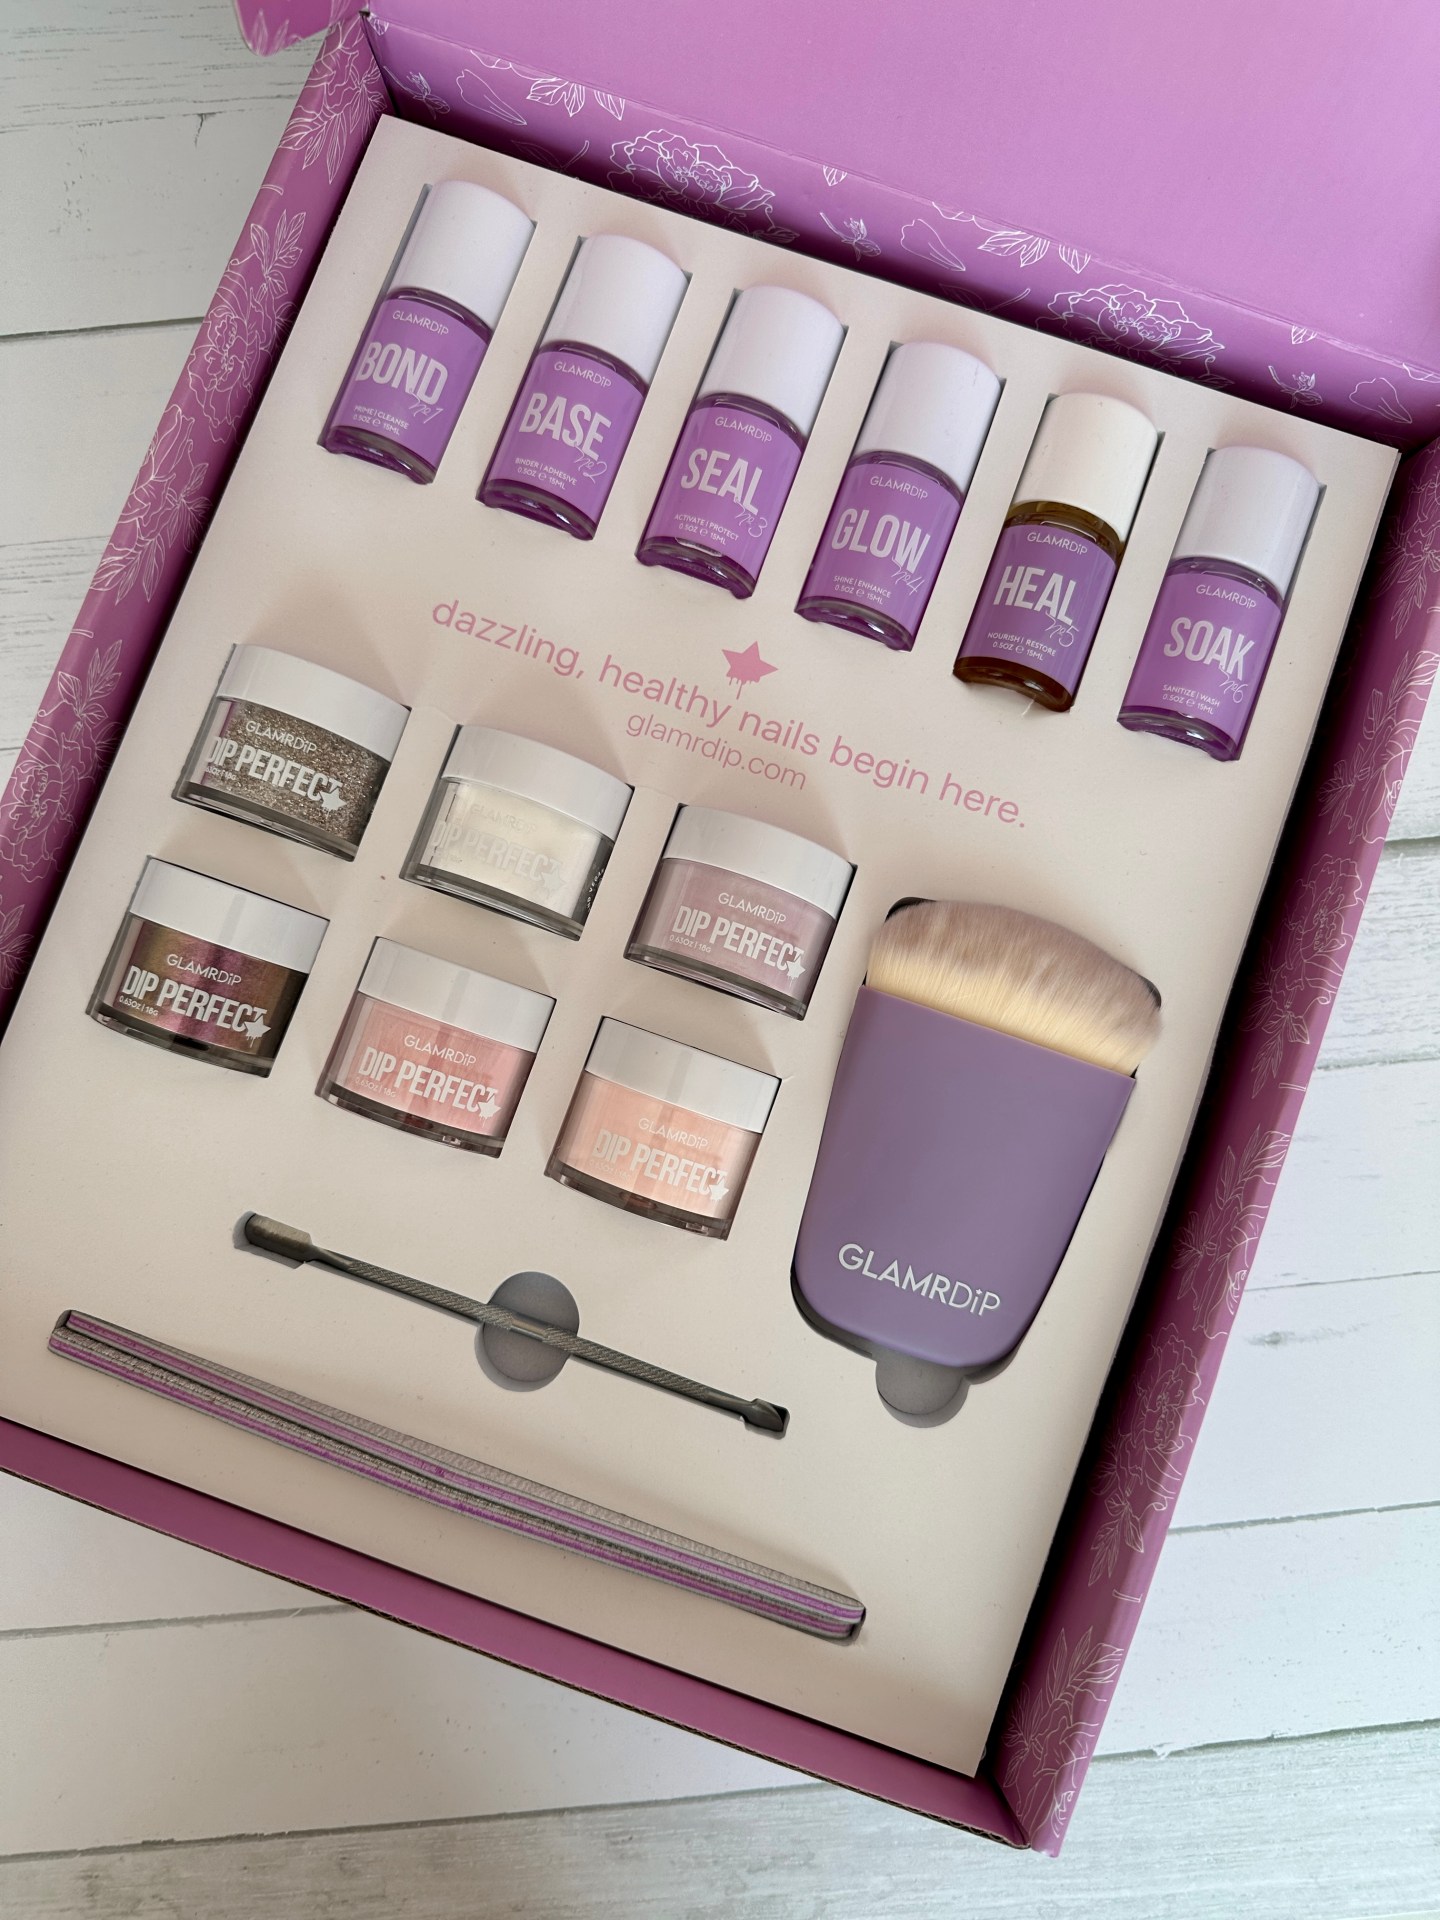
When it comes to buying the GLAMRDiP System, you have a few choices. While you can buy all of the colours and liquids separately, the easiest way to get started is by buying a kit. There are a number of different kits available that comes with all the things you need to do a set of nails. You can then choose how many colours you would like to include in your kit. The most cost effective kit is the Ultimate Kit, which is the one I have. It comes with the following:
- 6 dip powder colours of your choice
- Nail file set
- Steel cuticle presser
- Nail brush
- The full 6 liquids – Bond, Base, Seal, Glow, Heal, Soak.
- Detailed instruction booklet on how to apply and remove
As well as this, you can also buy pre-shaped nail tips from GLAMRDiP. These come in a range of shapes, depending on your personal preference. I have the extensions in Ballerina, however as I write this review I am yet to try them out. According to the instructions, they are easy to apply with your Base acting as the nail glue, so you don’t need a seperate product for this. Once I try these, I’ll update this post with my thoughts on application.
I also recommend that you purchase the Remove Solution as this is the easiest way to remove the nails. Alternatively you can use an acetone product. There is a video online and detailed instructions in the booklet on how to remove the nails, and it’s pretty much the same as you would with acrylics or gel.
HOW EASY IS THE SYSTEM?
I know what you’re thinking. I’m not a nail tech, so how easy is it? The truth is, I found it really easy to do. I am by no means an expert at nails, however the instruction booklet that comes with the system is so easy to understand and very thorough and it takes you through the process step by step. It also includes a lot of tips and tricks for getting the best nail application.
Before I applied my nails, I did take some time to look through the booklet. I also watched a couple of videos on their website (their website is fab for videos and super helpful answering any questions you might have.) Personally I do think you also get better at applying the nails with time, so I expect the more I do it, the better I’ll get. The other recommendation I have, is if you are a beginner to dip nails, start with a lighter colour which is a little more forgiving until you get the hang on how to apply.
HOW TO APPLY
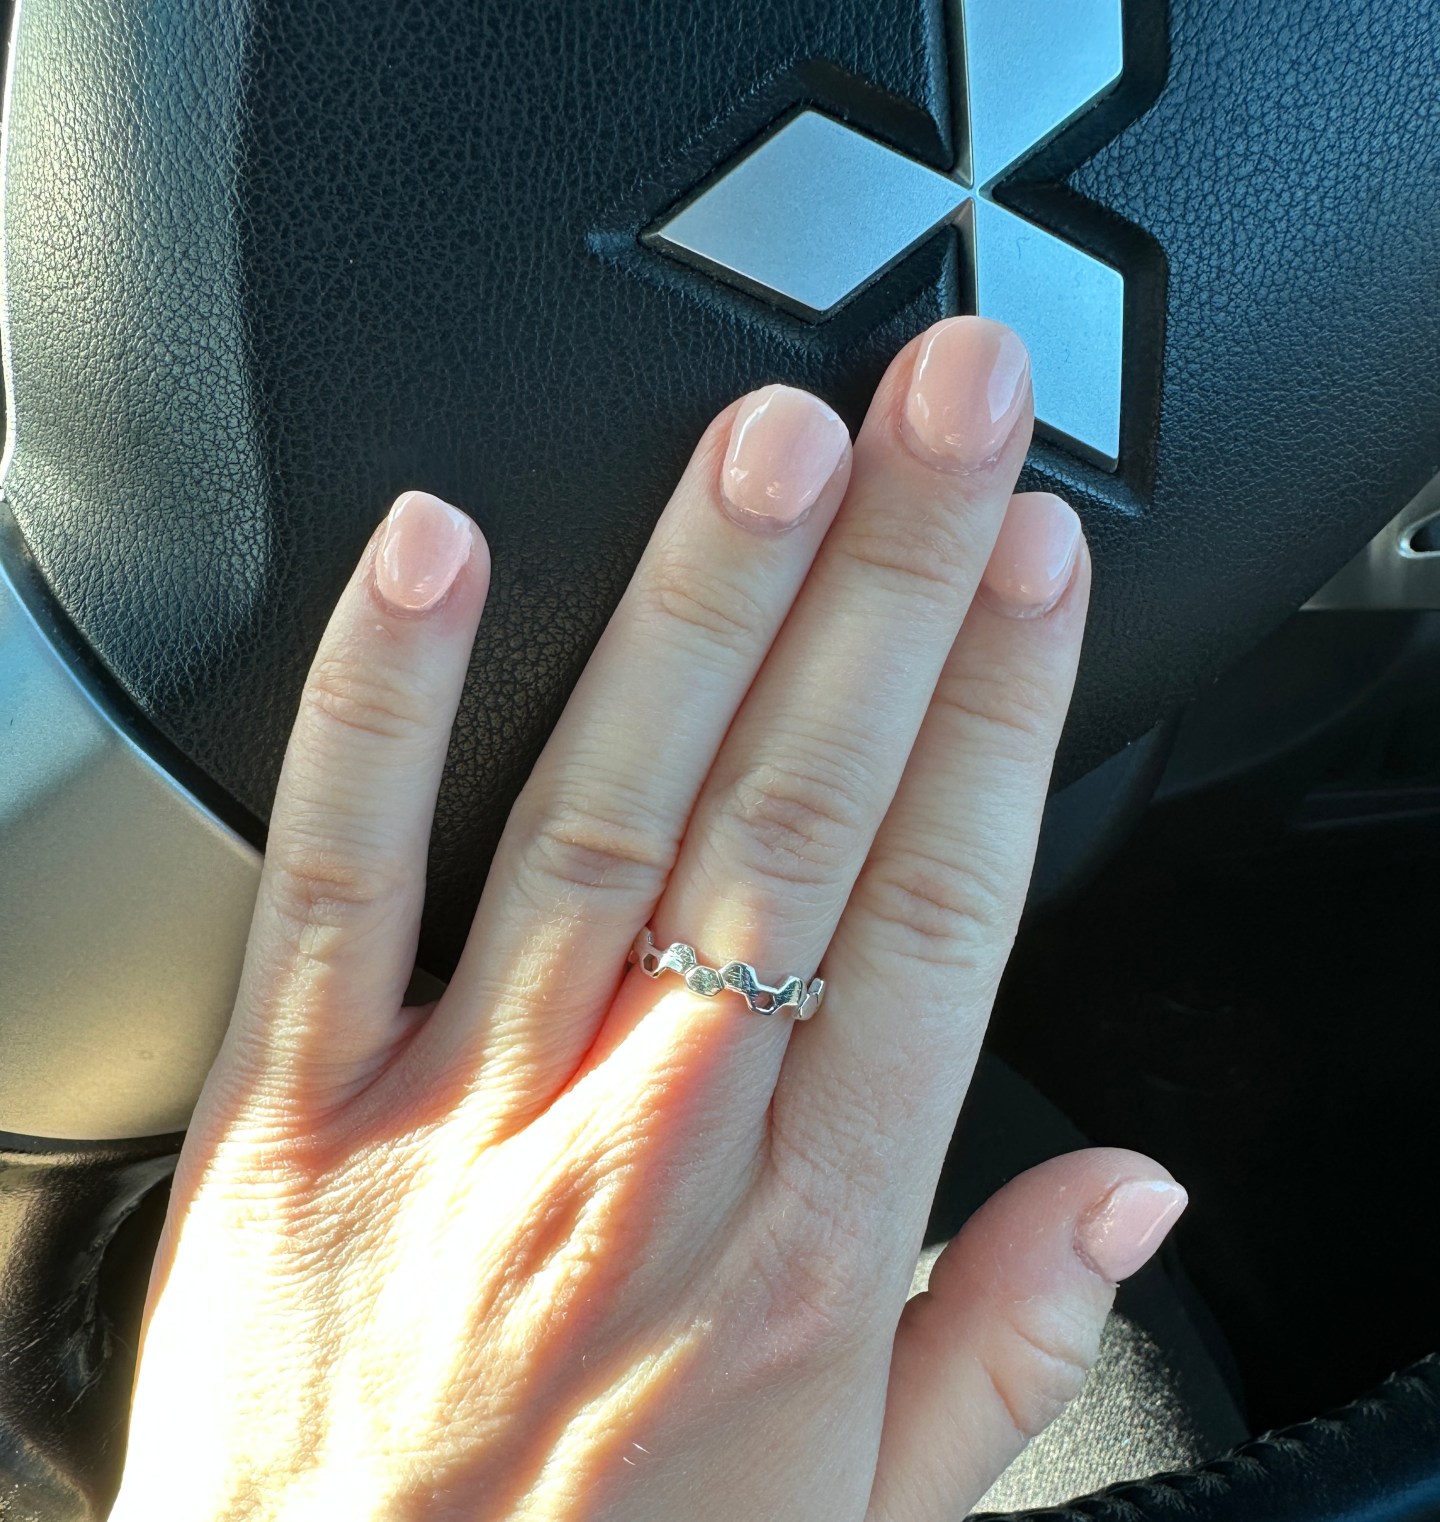
So how do you apply the nails? In a nutshell, buff and shape your nails using the nail file set. Use the cuticle pusher to press your cuticles back and then apply the Bond to clean your nails. Then it’s dipping time! Use a thin layer of Base over your nails and dip them into the clear powder first. Then brush off any excess with the fluffy brush. Rinse and repeat with your choice of colour twice, and then another time with the clear powder. Then it’s apply a coat of Seal and buff your nails to the right shape and look. Another coat of Seal, two coats of Glow and you’re done. You can then apply the Heal which is a cuticle oil to your nails.
While that all might sound a lot, the process is very quick. It probably took me about half an hour to do it the first time (not including removal), which is much faster than having to travel to a salon to get them done! The liquids also dry quickly, so the most you are ever waiting is about 2-3 minutes for the Seal to dry. Once it’s all set, you have rock solid nails – just as if you had them done in salon. No smudging, no mess, and no fuss. I find it quite fun to do, and it’s extremely satisfying to see how good the result is!
OVERALL
I’m super impressed with this system and love how quick and easy it is to use! GLAMRDiP suggest that you get around 40 manicures out of each kit and each manicure lasts 2-5 weeks (depending on application). When you take into account how much you can spend at a nail salon, this kit really is a no brainer if you love having nice looking nails and want to save money. The kits often come on sale too, so keep an eye out or sign up to their newsletter for when they have up to 20% off.
As mentioned above, the manicure is quick and easy to do and practice really does make perfect. You’ll be left with salon quality nails, that have that nice hardness and shine to them (one of the reasons I love getting my nails done!). The fact it’s also a lot healthier to use than regular nail polish, acrylics or other dip nails also makes it a winner in my books.
TIPS & TRICKS
Okay, like I say I am by no means a nails expert, but here’s a few tips and tricks to get the most out of your mani
- Make sure your nails are completely free of polish and are totally clean. This is your best bet for getting the product to stick the best
- Have a wipeable cover underneath your workspace. It’s not super messy, but you will likely get some powder fall out, so being able to wipe it up is much easier
- Don’t load too much of the base near the nail bed as this is how you will get that dip nail ‘bulge’. Coat about 3/4 of the nail the first go, then a little lower for the second coat, and full nail for the third coat. This will make your nails look much more natural and not bulky near the nail bed
- When you are starting out, practise with a lighter/natural colour. Then as you get better with application go for darker colours. The lighter colours are a lot more forgiving of any mistakes!
- Keep all fibres and dust away so they don’t stick to your mani
- When you are ordering your kit online, grab an extra Base as this is what you will go through the most of
- Be sure to order a clear powder. This will save your colours from being used up on the 1st and 4th coats.
- Also, you don’t have to do a 4th coat. 3 is enough as long as you have full coverage.
Click here to get 10% off your first GLAMRDiP order!